Showing posts with label recipes. Show all posts

Thursday, July 31, 2014

Pickled Eggs

These are the people in my neighborhood.


Stand still chickens!  We'll get better pictures of them next time, I promise.  Perhaps a poultry pageant of sorts.

Those are actually just a few of the chickens in my neighborhood.  I have the unique opportunity to be "in the city" not so far from downtown, but also directly in the middle of two great neighbor friends with six chicken each.  That means, I have fresh eggs!  Sometimes lots of them if we're chicken sitting. 


 So let's use eggs.  Pickled eggs, just to be different.

Just a quick note:  I love eggs and finding creative ways to use them.  But I do not like hard-boiled eggs, deviled eggs, or anything similar.  This recipe is a favorite of the other 2/3 of the household, though.  We can't all stop because of what I don't eat, right?  Right.

Here's what you need:
Hard boiled eggs, as many as you want to make.  We usually do right at a dozen.
Pickle juice
Maybe a large jar if you're doing a big batch that won't fit in your existing pickle jar.

That's all!


Boiling fresh eggs is a little different.  Boil the water first, then carefully lower your (very well washed) fresh eggs into the water.  Make sure the water is covering the eggs.  Once they're covered and boiling, set a timer for 15 minutes.
 

Prep a bowl of ice, so when your egg timer (Oh wait! Now I get why it's called an egg timer.) goes off, you're ready to go.  Strain your eggs into a colander then put them on ice.  Top off with cold water, and chill.

You can literally go chill while your eggs cool off.  Homey took this opportunity to hop in her pj's...you can totally continue with your evening routine with cooking projects like this.  Why not get your pj's on?


We did this little family activity one evening after dinner, so a lot of these pictures are not the best quality. And eggs and pickle juice aren't very photogenic either, I've decided.  I do, however, include the above picture as an example of how all of us (minus Emilie the cat) manage to squeeze into the same square foot whenever anyone is trying to do something in this tiny kitchen of ours.  All I can do is shake my head, sigh, and resign myself to appreciating that we're all here enjoying time all together.  ALL here, all together. 


 Anyway, once the eggs are cool, just tap them on the edge of the sink and peel away!

To take regular ol' hard boiled eggs to a new level, just pull out those jars of pickle juice that you've saved.  I have more reasons than just pickled eggs to save those, so just hang on to pickle juice going forward, won't you?   For now, just put those eggs in the juice.  Little Homey hands and arms make this an easy task. The eggs need to sit in the fridge for about a week to properly pickle.  But I guarantee if you like any form of hard boiled eggs, you'll like this variation.


The insanity doesn't have to stop there, though. Tracy got us started pickling eggs when she served up some perfectly precious pink "peviled eggs".  She pickles hers in beet juice!  I don't eat those either!  But given the way everyone but me gobbles them down, I'm betting they're good.  Go get wild, and pickle an egg. 


Wednesday, July 9, 2014

Lacy Lavender Oatmeal Cookies


 I don't in any way consider myself to be an accomplished baker, but it is nice having homemade cookies in the cookie jar. And we like cooking and baking with Homey as much as possible to work on fractions and measures and to keep her comfortable working with kitchen equipment.  She's becoming quite the sous chef!  She and I decided to make this oatmeal cookie this week.

This is a great summer cookie. It's light and lacy, with the unexpected hint of lavender just to be different.  It's a more sophisticated take on the basic oatmeal cookie, but the kids love these too.

I like to stick to the tried and true cookie recipes on sites Better Homes and Gardens, as I remind you all again that I really don't bake.  This basic oatmeal cookie is consistently successful and a great base for variations.  Add raisins if you're into that kind of thing.  Gross.  Or add chocolate chips for a great afternoon snack for the Littles.

 I guarantee you'll have most of the basics on hand:  sugars (white and brown), baking soda and powder, quick oats, 1 1/2 sticks of butter, cinnamon and vanilla.


To keep things light and summery, we're going to add lavender. (Bonus points for the chipped grimy fingernails...you're only 8 once,right?)  I found this at Target, so I imagine you can get it at any grocery store with a decent selection of spices.


Follow the basic recipe, omitting the cloves and adding 1 teaspoon of lavender.  My batches took about 9-10 minutes, so just start watching them after around 8 minutes in case your oven is hotter than mine.  The edges need to begin to brown or else the lovely laciness will turn into lovely crumbles.

Not that that's ever happened to me.  Just trying to set you up to succeed.


The lavender makes you want to pull out fancy, frilly plates and invite ladies to lunch.  So good! Enjoy! And I'd love more ideas for embellishing the very basics in baking.  Let's just keep it very basic.

Off to repaint Homey's fingernails! :)


Wednesday, April 30, 2014

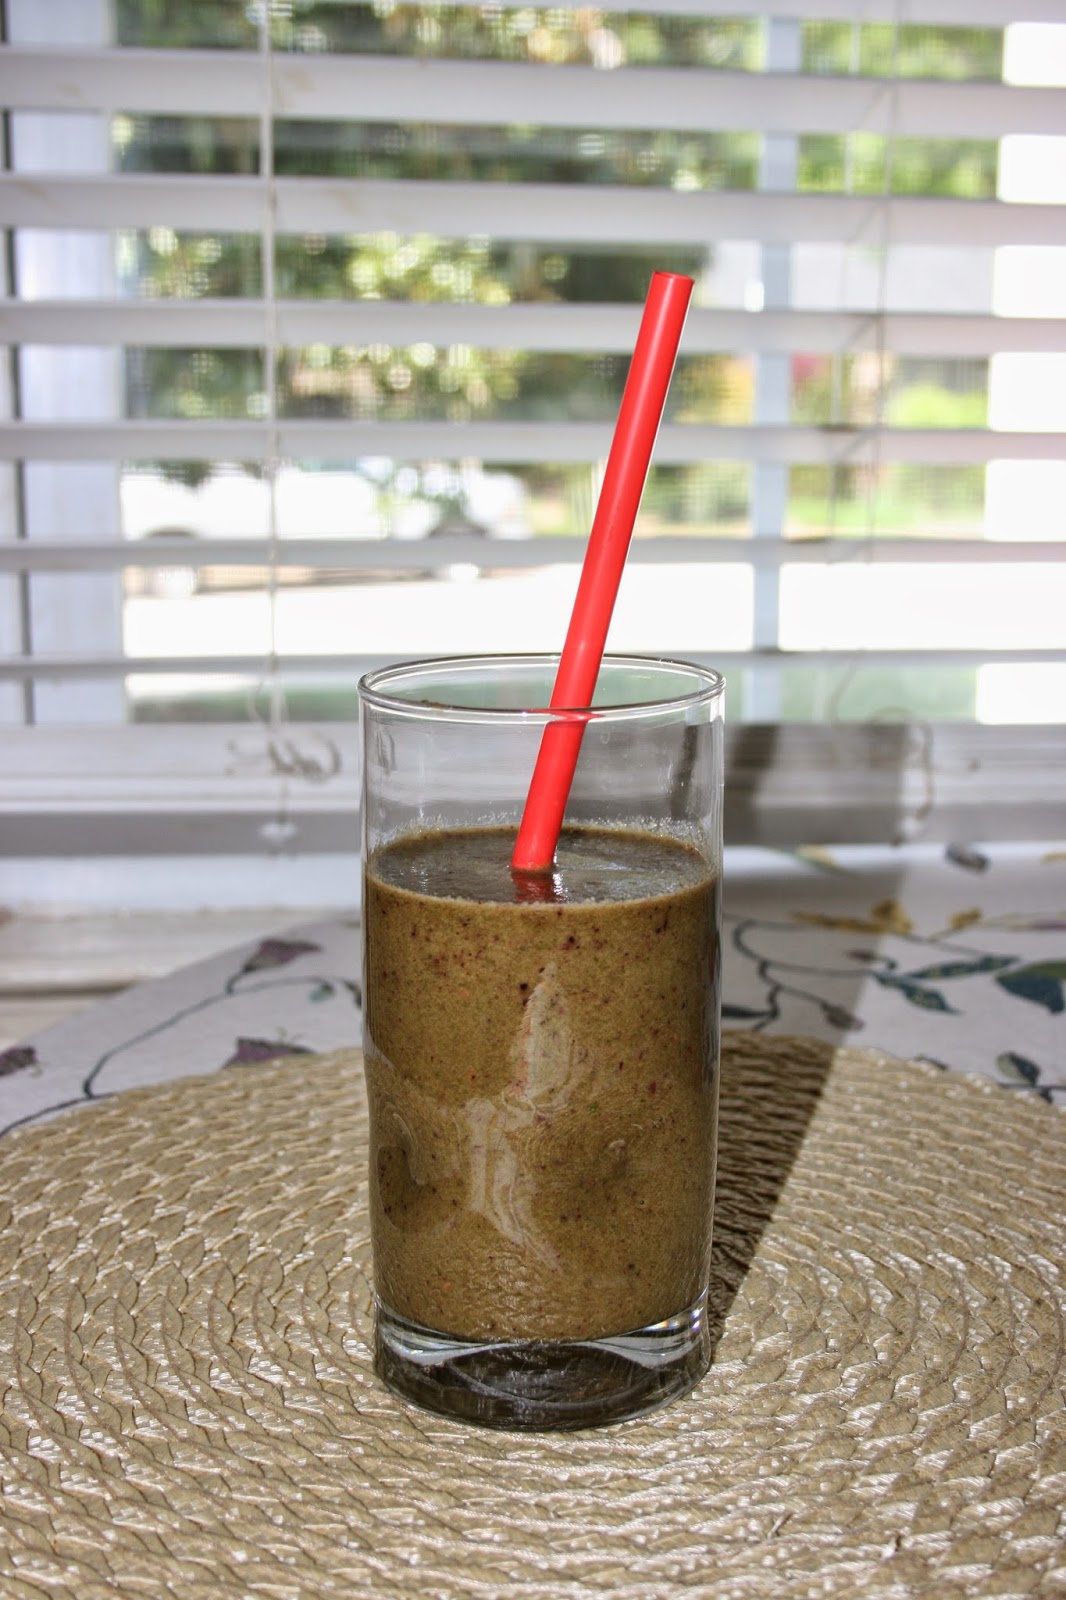
Spinach smoothie

Energy is a tricky thing.  Like "spare time", there's never enough of it no matter what stage of life you're in.  Right now, I'm in a work full-time, still get in all my domesticity, continue to start and/or finish projects on the house, and have significant play time with the family kind of stage.  Oh, and try super hard to establish a successful blog kind of stage too.  So, I'm tired. Who knew I'd find a golden energy source in a silly little green smoothie.
 
Green smoothies have become very trendy lately.  Any time I scroll through Pinterest, there's another version to try.  As with most food trends, I find it easy to stop clicking on the pins altogether and disengage. Especially something like smoothies.  Almost every single recipe has some banana in it.  If you know me at all, you know that to say I have an aversion to bananas is an understatement.  Blech--I can't stand those things!  I'm really glad I didn't skip over the green smoothie though.  No banana required!  (Continue to support your favorite banana farm though if you can stomach those buggers.  I hear they're a great source of potassium!)
At first the thought of drinking spinach made me very wary.  I love spinach--cooked, raw, wilted--I love all of it.  Sipping it through a straw made me very uneasy though.  Turns out it's delicious!  Addicting even.

Here's what's addicting about it.  Yeah, it's a healthy snack.  But most healthy snacks honestly leave me still starving and unfulfilled in general.  This smoothie, especially as an addition to your morning routine, will give you an amazing boost.  I'm used to powering through the first half of the day jacked up on caffeine.  But the jittery feeling that comes along with energy is so unnerving.  The spinach smoothie just gives you complete energy.  To the point of watching how late in the day you drink one.  Past a certain point, your second wind may turn into a third wind.  You may never get to sleep!  
 
But boy, were you productive!! ;)


Here's what you'll need:
Fresh spinach (I use baby spinach leaves)
1 apple.  Any apple.
1 stalk of fresh pineapple
frozen berries


I have a rather stout Cuisinart blender, so I let it do most of the work.  Cut the apple from the core in chunks, cut the pineapple into large pieces, throw in a generous handful of spinach leaves, then a smattering of frozen berries.


Add just a bit of water, just enough to help it blend.


Then blend!  I use the "ice crush" setting on my blender.  It takes a few goes to get the mixture whirling.  If fact, I often have to shake the pitcher a few times to help it along.  Once it gets going though, you've got an amazingly healthy beverage. 


It's really thick; reminds me of applesauce, with a definite berry flavor.  The pineapple really only lends a bit of sweetness, and the spinach gives it an earthy wonderfulness.  All three of us have really gotten hooked.


Of course there are a myriad of smoothie concoctions out there, all of which are probably healthier than most go-to drinks or snacks.  Check out this list of recipes by A Beautiful Mess for more ideas:  http://www.abeautifulmess.com/2013/08/its-smoothie-time-.html

Saturday, February 19, 2011

Greek Chicken Soup

Anybody got more chicken to use up?? Make soup! Homemade soup! Specifically, make Avgolemono. Since I don't know how to say that word, just call it Greek Chicken Soup! This soup is creamy, and chickeny, and ricey, and lemony. In a word, it's just delightful! And like a lot of these other recipes, a great way to use up ingredients from other meal (GO meal plan!). Here's all you need:


about a cup of cooked chicken (this was leftover fried chicken)
4 cups of chicken broth
1/4 to 1/2 cup of lemon juice (start with a quarter, then taste it...make it as lemony as you want!)
1/4 cup celery, diced
1/4 cup carrots sliced or diced or shredded (**see disclaimer)
4 egg yolks, lightly beaten
2 tbsp butter, softened
2 tbsp flour
1 cup of cooked rice (see all the reasons to make a little too much rice! Makes me giddy!)

**disclaimer. I do not eat orange food (this excludes cheddar, for obvious reasons). The only way I will eat a carrot is if it's in soup and tastes more like chicken than carrot. And the reason I put the larger piece of carrot in this is so it can't sneak up on me. Carry on...**

Bring the chicken broth to a slight boil in a large pot on medium high. Chicken broth gets nutty on high (and not as in "takes on a nutlike flavor or consistency"...it goes all over the place!). Add in your vegetables. Turn the heat down to medium, and let that simmer for at least 20 minutes:


I let it go longer, so the carrots can taste like chicken!

Meanwhile mash the butter and flour into a paste, like this:


Then stir that paste into the broth.

Now is when this soup gets good. Temper the egg yolks:


Just take a small bit of broth out of the pot and slowly pour into the egg yolks while stirring. (Very hard to take a picture of, by the way!). If you just dump them in, you'll have scrambled egg yolks instead of a creamy soup...

Next throw in the lemon juice, the chicken, and the rice:

Let all this warm up (but turn the heat down to lowish...again, don't mess with an egg yolk...)

That's it!


Serve it in your favorite jadeite bowl...the great thing about vintage dishes is that you are getting a true serving size. Not a modern day America Super Sized serving. My "modern" soup bowls are the same size as my 2 cup mixing bowl. Insanity. Portion control, people. Eat real milk, real sugar, real butter, real food! But not out of mixing bowls!

**Another disclaimer: This portion control trick does not work with coffee cups! I would much rather slurp my coffee up in a "modern" trough-like mug than my dainty lady-like 6 oz jadeite cups. A girl needs her caffeine...don't hold out. And don't serve coffee in a 6 oz cup until after 11am, at least!**

That wraps up Chicken Session #1. Enjoy!

Friday, February 18, 2011

Groundnut Stew


More chicken...mmmm! Today is Groundnut Stew. Affectionately called Peanut Butter Chicken at my house. Today we're going to cook at Tracy's house because her counters are pretty than mine. Here's what you need:


Chicken (not pictured! gasp!)
6 oz can of tomato paste
1 green pepper, sliced
half of an onion, cut into wedges
3/4 cup of peanut butter (I strongly recommend using crunchy peanut butter)
3 cups of chicken broth
1 tsp salt
1 tsp chili powder
1/2 tsp nutmeg


Two side notes here: First off, I don't want to hear anyone saying that this doesn't look good because of the strange ingredients. Do you understand me?? You will try it and you will like it! (That was JMom's voice coming out of my fingers!) Secondly, there are tons of options as to what kind of chicken you use for this recipe. It's a crock pot recipe, so it just depends what you have on hand. I usually use about 5 or 6 chicken tenders. This particular night we used 2 bone-in chicken breasts. You can also use leftover cooked chicken and cut the cook time in half.

Okay, back to it...here's where it gets complicated:


Place the broth and chicken into the slow cooker, then add the tomato paste and peanut butter.

Then add everything else.

These spices rock.

Oh, check, check it:


We went crrrrazy and added mushrooms this time! Talk about throwing caution to the wind...it must've been Thirsty Thursday or something!

Cook on low heat for 5-6 hours (about 3 hours with cooked chicken)


Stir everything up occasionally,


Serve over rice with greens, then take a horribly dark picture of this delectable stew.

Beasts that eat Groundnut Stew with a cheerful heart get apples and a cookie for dessert (they actually did not have to be prompted or prodded to eat this...they loved it!).


It doesn't get much easier than this...give it a try before crock pot season is over!

Thursday, February 17, 2011

Chicken Divan


Chicken, chicken, chicken. What's for dinner? Chicken. Blah! Nothing gets blah faster than chicken.

But good news! We're going to do a few posts on making chicken a bit more delicious. Healthy? Not necessarily. But delicious, yes. And even better news...most of these recipes are perfect for using up leftover chicken which makes meal planning so easy! (Please tell me you meal plan. Please tell me you sit and make a list of 3 weeks worth of meals at a time so you can make the most of your grocery list...I will feel quite awkward if I'm the only person that does that.)

So the recipe today is for chicken divan. As far as the meal planning goes, if you have a whole chicken on Sunday (rotisserie or fried), just shred the leftovers to use again 2 days later. If you grill chicken one evening, throw 2 or 3 more pieces on the grill while you're at it, so you'll have extra for this recipe that week. Here's the other reason that approach is the best one: because I hate poaching chicken. It makes me gag. I cannot stand the smell of just throwing some chicken in some water so I can have cooked chicken for a recipe. GA-ross! Here's the ironic thing: I had to do just that for this blog post. Serves me right, I suppose, for not putting rotisserie chicken on my iGoogle "Meal 1" tab of My Listy. Whatever. Here's we go....here's what you need (stuff you already have, I bet!):


About 2 cups of cooked chicken
1 can of cream of chicken
1/2 cup (give or take) of mayonnaise
a good dollop of sour cream (precision is everything with me)
about a half a bag of frozen broccoli, cooked
1 cup of cheddar, shredded
1 cup of cooked rice

**Meal plan tip--Make more rice than that, so that the next day you can throw all your leftover meats and veggies from that week in with the rice to make fried rice!**

This is where this recipe is so easy, it's almost hard to call it a "recipe".


Dump all the above ingredients into a large mixing bowl. Taste it and add salt and pepper to taste.


Then dump all that into a casserole dish, a 9x13 will be just perfect. Bake at 375 for about 30 minutes. You want it to be heated through and bubbly.


Delicious. And the joy of a casserole, if you're obsessive like me, is that all your prep dishes have been rinsed and loaded into the dishwasher while it's cooking. Ahhh...I just love a meal like that!

Oh, and word to the wise...add a bag of wavy potato chips to your grocery list on Chicken Divan week. You will adore having wavy chips with your leftovers for lunch the next day!

Tuesday, April 13, 2010

Simple Simon

When I was little, there was a small store in a shopping center that sold the best pies I have ever tasted. I know that as an 8 year old, my tastes couldn't have been very discerning, but there is something to be said for the tastes of childhood. I'm sure that often they are better in our memory than they ever were in reality.

The name of this store was S. Simon's and all they sold was pie. Whole pies, pies by the slice, warm derby pies, cold fruit pies. It was cool and refreshing to walk into, just like an ice cream parlor. And it was brightly painted with scenes of Simple Simon meeting the Pieman. I know that JMom always got the warm derby pie. I think they had a huge slice of chocolate deliciousness that I used to love. I know for a fact that the Strawberry Cream pie was my favorite. The custard was just the perfect amount of sweet and creamy. The strawberries were simple sliced and laid on top of the custard. No glaze, no added sugar. There may or may not have been fresh whipped cream. If there wasn't, then I certainly don't see why there can't be going forward! Anyway, somewhere along the way, that delightful and delicious establishment closed. There was no more Best Pie Ever.

But all is not lost! Somehow this scrap of paper ended up in my possession.

The recipe to the S. Simon custard for pie! It may not be the right crust, and it may not end up looking like the fluffy mounds of cream topping in the refrigerated case at that enchanting store, but it's a start! And I'm finally going to try to make it.

First of all after reading the recipe, I decided that this either makes a ginormous pie, or it's custard for 2 pies. So I cut the amounts in half. Here's what you need for one pie:

3/4 cup sugar
1/4 cup cornstarch
1/4 tsp salt
3 cups milk
4 egg yolks (save the whites...give yourself a facial or make meringue. Don't be wasteful! We're in a recession for cryin' out loud!)
2 tbsp butter (unsalted, as usual)
1 tsp vanilla extract


Mix the first five ingredients in a heavy saucepan, turn the heat to medium low. I set my stove to 2 notches below medium. Grab your wooden spoon, a barstool, and your laptop. It's important to multitask while stirring. It'll only take 15-18 minutes of Facebooking...then you should see the custard getting quite thick. At this point, it should start bubbling, much like with JMom's mac and cheese sauce. The scrap of paper just says "Stir. Boil 3 minutes". Please be advised that this means to stir constantly. And you're not looking for a rolling boil here. This is custard, people, not pasta. I did slow down the stirring while it was boiling. Just move it around a little at this point. After the 3 minutes is up, take that deliciousness off the heat. Add the butter and vanilla, then stir to combine. This is what you should have now:
Go ahead and pour it into a prebaked pie crust. My pie crusts are usually a complete disaster. The only exception is when I buy refrigerated ones that are Julie-proof. Homemade pie crusts make me mutter inappropriate things and feel domestically inadequate. So for today's recipe please ignore that hideous piece of pastry.

Once filled, place the pie in the fridge to chill for several hours:
Since the pie crust was a culinary disaster and wouldn't even make it up the sides of my dish , I had a little custard left over. Slip that in your vintage refrigerator dish, please. Grab spoonfuls throughout the day.

Once the pie is chilled and set up, I suppose you could add just about any fruit to the top. I thinly sliced strawberries and sprinkled them with just a little bit of sugar. I let them hang out in the fridge to get a little juicy, then just slapped them on top of the custard. The combination of the berries and custard is just perfect. This pie isn't going to last long around here.

Which makes me wonder if I should plan on making another pie soon. I also wonder if it would be appropriate to have a pie extravaganza. All pie, all the time?? Sweet and savory! Chilled, baked, or fried! This is definitely something I'm going to have to spend some time thinking about. I'll report back with my decision.

Thursday, February 25, 2010

Stir It Up!

The time has come. Time to share the recipe. THE recipe. This is my momma's macaroni and cheese. It's a little time consuming, but it's totally worth it. Everyone is different when it comes to mac and cheese. Some people like it goopy and shiny (think out of the little box), some people like it firmer and egg-y. This recipe, to me, is just perfect. It's firm (but not eggy), and still slightly goopy. You have to have a little patience though...trust me, it's worth it. The recipe listed here makes a normal sized casserole dish. It feeds the 3 of us with leftovers. You want the leftovers. If you are feeding more than 4 people, then you might want to double it. That's where the stirring part gets tricky. I'll discuss later...let's make it.


Ingredients:

3 Tbsp butter
2 Tbsp flour
1 1/2 cups macaroni, cooked
2 cups milk
A heap o' cheese (the more the better...since I'm not stirring the white sauce for fun, I do 3 cups of shredded cheddar)
Salt and pepper to taste

Preheat the oven to 350 degrees. Cook macaroni, drain, and set aside. In a large saucepan, combine butter and flour over medium heat to make a roux. Turn the heat down one notch and add the milk. Stir constantly until the mixture thickens and starts to slowly bubble. This bubbling is really subtle so after about 15 or 20 minutes of stirring, stop stirring just to look for the thick milky bubbles popping up through the surface. (Note: When you double this recipe, be prepared to stir for 30-40 minutes at least. Go ahead and bring the laptop into the kitchen and catch up on Facebook and emails while you absentmindedly stir). Ok, at this point add salt and pepper to taste. I don't add a whole lot. Next add in your shredded cheese. Stir it for a few seconds until the cheese it melted. Add the cooked noodles into the pot and stir to coat the noodles in the cheese sauce.

Transfer the mixture into a casserole dish. Bake for 30-40 minutes until browned and bubbly.

It rocks. Amen.

Tuesday, February 16, 2010

THE Brownies...


These are by far the best brownies I have had in a long time. I can't take credit...my friend Christie shared the recipe, and for that I am forever grateful! These brownies are rich, dense, moist and fudgy...everything a brownie should be. You'll never make them out of a box again. Let's make them!


Ingredients:
3/4 cups melted butter
1-1/2 cups sugar
1-1/2 teaspoon vanilla

3 eggs
1/2 cup cocoa powder
3/4 cups flour
1/2 teaspoon baking powder
1 teaspoon salt
1 cup chopped, toasted nuts, optional
1 cup semi-sweet chocolate chips

Preheat oven to 350 degrees, and grease a 13x9" pan. Beat melted butter, eggs, sugar, vanilla in a large bowl. Mix in cocoa, flour, baking powder and salt. Stir to combine. Don't
beat the tar out of it! This is the prettiest batter I had ever seen. I don't bake much, so I didn't know batter could be beautiful. This batter is beautiful. Stir in nuts and chips. Pour into pan. Bake in a dark metal pan for 20-22 minutes.


See? Batter = Beautiful

As a side note, start checking the brownies at 22 minutes. Mine have typ
ically taken several minutes longer. Just keep checking them until a knife inserted in the middle comes out clean. I think it's more like 25-27 minutes, but it will depend on your oven, your elevation and whether or not Venus is in retrograde...

This recipe is so quick and easy, so it's a great chance for Homey to help out. She likes butter...

And here's a nifty trick courtesy of Alton Brown--instead of greasing the pan, line it with a sleeve of parchment paper (oh, how I love parchment paper). There should be an excess of paper along the long sides of the pan. The point is to pull the entire slab of brownies out in one fluid motion once they're cooked. When the brownies are done, loosen the short ends with a knife and pull the whole shenanigan out while it's still warm. Using a pizza cutter, go ahead and slice the brownies while they're warm. You'll have perfect squares instead of ripping them to shreds in the pan :)


Monday, February 8, 2010


Hi, Tracy here. I cooked for my family tonight! Even though I love to cook, sometimes the time gets away from me. Before I know it the Beast is hungry and there's no time for preparation. All that's left is spelunking in the freezer for leftovers for dinner.


But tonight I made almost homemade Chicken Pot Pie (yum). I'm really bad about throwing things together without measurements so I apologize.


boil a skinless, boneless chicken breast in some water with salt, pepper, fresh thyme and a little chicken base until done, cool and chop
saute about half a small onion in 2 T olive oil until soft
then add 3 T flour, stir and coat onions about 1 min
add 1/2 cup dry white wine, stir and cook about 2 min
add 1 cup of the chicken broth from the boiled chicken and 1 cup milk to pan
stir until thick; add salt, pepper and fresh thyme
add chopped chicken and small package of frozen vegetables (peas, carrots, green beans, corn)
pour into pie pan
top with a rolled out refrigerated pie crust
pinch and fold over edges of crust to seal
cut several vents in the crust and place on baking sheet
bake at 400 for 30 minutes

You could add any vegetable combination you want. If your family would allow (mine won't), some sauteed mushrooms with the onions would be delicious.